
July 28, 2018
The overall goal of this project is to restore the Hotel Berry, while bringing it up to code.
The specific project is to ready the west half of the second floor for occupancy. This means 5 insulated rooms for beds, two baths and a larger day room. Actually, all the plumbing, including the third floor is included in this first phase making two two-hole restrooms and two three shower rooms.
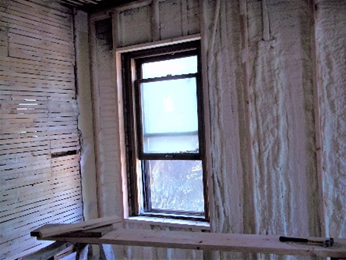
Insulating the rooms is accomplished by studding out along the outside brick wall and using a fire rated foam with a fiberglass insulation between. The result including an estimated R-3 for the current brick walls is an R-value about 22.
At the advice from my friends at HistoricDistrict.com, I decided to rebuild the existing double hung double pain windows rather than replacing them. Where the plaster is weak, we insulate to the brick. However, where it is solid, I am simply going over the lath and plaster.
We replaced one wall (removed long ago) by making a beam to set upon the replacement wall. We lifted this beam to level the third floor. The partial wall below distributes the load to the floor joists rather than to posts at either end of the beam. This approximates the original load bearing scheme.
Next, we tackled the dreaded “room 25”. I had heard that the original plumber had cut a floor joist to install the toilet, but what we found was much worse.

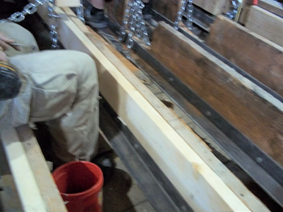
Someone, wanting to make the Hotel Berry into an apartment complex, decided to place a bathroom in the southwest quarter of the building. Keep in mind, the Hotel Berry was built before electricity and water was available in town. There are no provisions in the original design for water in this building. Someone ran a 4” PVC drain pipe from where the tub would be to where someone long ago, cut a floor joist to install a toilet. Notice how neatly he cut the 2” by 13” floor joists (actual). These floor joists not only carry the load of the 23 foot clear span dining room ceiling with decorative metal, but they also tie into the exterior brickwork: holding the building together.
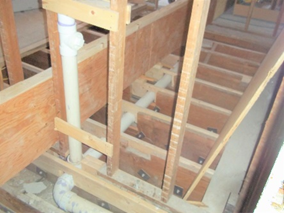
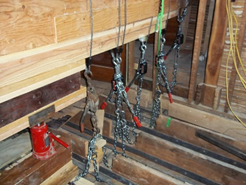
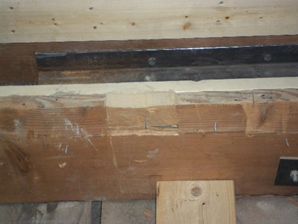
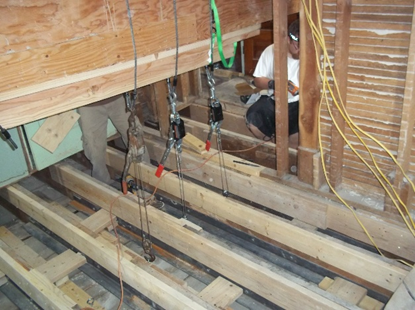
These pictures show the damage and attempt to correct the error from

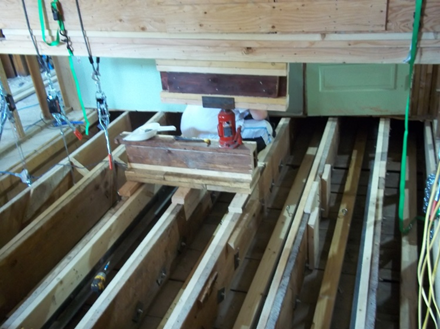
opposite ends of the pipe. Fortunately, he left two inches at the bottom of the joists, alleviating the need to guess the original length of the joists. We built a twenty fool long 4×20 beam, seen in both pictures, to pull the joists up from above. Lifting from below would be impossible without damaging the irreplaceable ceiling. Fortunately, only seven floor joists were cut and 2x8s, were nailed to the original joists in an attempt to take the compression load.
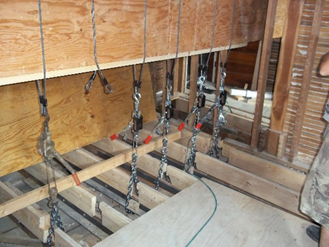
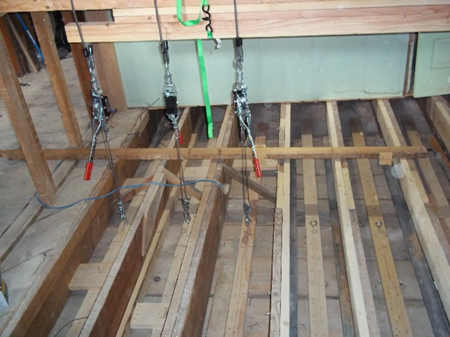
Here you can see how we used wire ropes, chains and come-alongs to lift each joist individually.
We cut the 2x8s he had installed so we could lift each joists to level. I should mention that he also installed 3×3 x3/8 angle irons to the original floor joists to handle the tensile stress. Starting from the less damaged
west, we leveled each joist, made a keystone plug to fill the hole, then glued / screwed a ten foot sister to the original.

Yes, that is a twenty ton bottle jack which helped the process.
This process took four days as we only corrected two joists a day, let the
glue dry, then moved the bottle jack closer to center to reduce the stress on the beam. The keystone plugs accept the compression loads while the sister planks add strength and guide us to straight. This left all nine of the floor joist very close to level and stronger than origianal
The next problem was to lift the ceiling planks themselves.
These 1x12s were originally nailed to the floor joists. The decorative metal ceiling is attached to these. There were places where the ceiling planks were three inches from the joists. We had to pull them up just as we had pulled up the floor joists. To do this, we installed eyebolts in the center of ten foot 2x4s, then screwed these 2x4s to the ceiling planks. And pulled.
Again, starting from the west, we made certain each ceiling plank was flush to the ceiling joist. We then fastened the 2×4 lifters to the joists. The result is a flat ceiling and floor stronger than original.
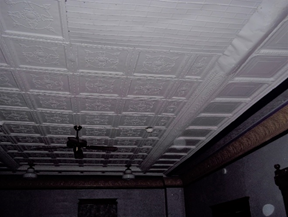
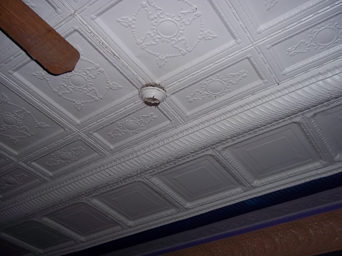
If anyone knows where I can acquire matching ceiling tile, please let me know. This last picture shows the light ring, now two inches from the ceiling.
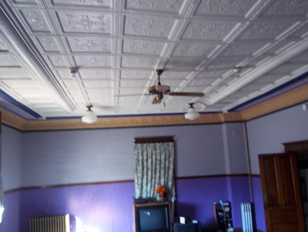
Before picture.